 DESSERTS
  BAKING
  MAIN DISHES
  SNACKS
  CHINESE FOOD
  HOME
HOMEGreen tea and butter biscuits
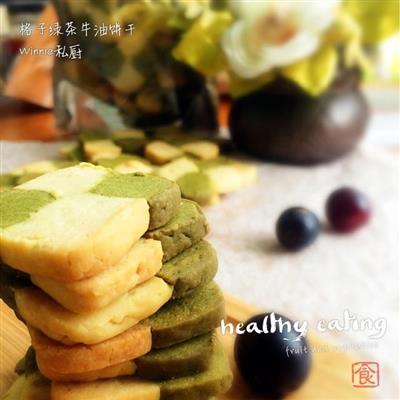
Suddenly I wanted to make biscuits, I've only made biscuits twice in the bakery, this is the first time I've made biscuits in a grid, there is no mold, the shape is slightly inferior, the taste is good, i.e. fresh and thick!
WHAT YOU NEED
Ingredients
Green tea dough: in moderation170 grams of high starch flour30 grams of starchGreen tea powder 25 grams80 grams of beefOne egg.50 grams of white sugar powderBeef and eggs: moderate170 grams of high starch flour30 grams of starch80 grams of beefOne egg.45 grams of white sugar powder
How TO MADE Green tea and butter biscuits
Steps 1 to 4
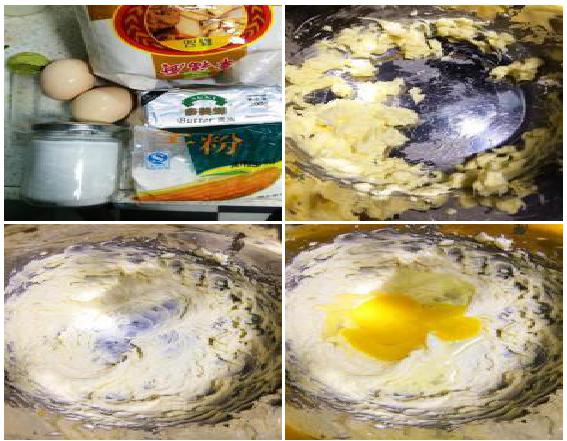
1. The materials are ready, separately labeled.
2. I made my own white sugar powder by grinding it into sugar powder in a cooking machine.
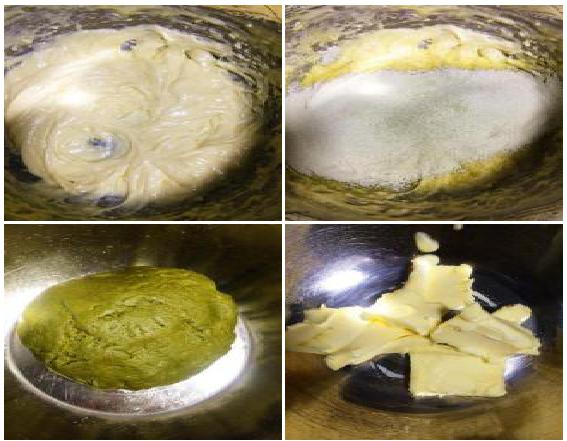
3. The dough is made separately, first the green tea dough is made, the butter is naturally softened, then the small pieces are sliced and sent.
4. Added sugar powder to pale yellow
Steps 5 to 8
5. The eggs continue to hatch.
6. Add the eggs and spread evenly.
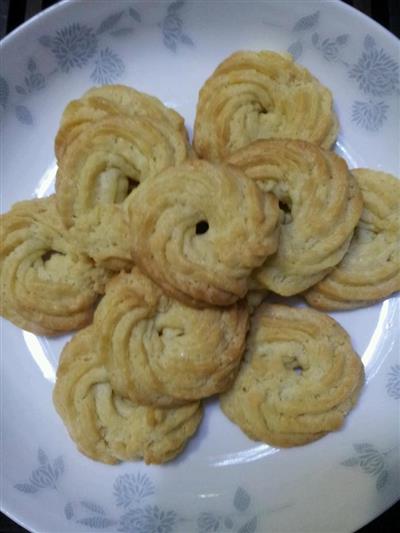
7. Sift into green tea flour (with starch) and mix with a scraper
8. Rub it by hand into a dough for use
Steps 9 to 12
9. Making butter egg dough, butter naturally softened
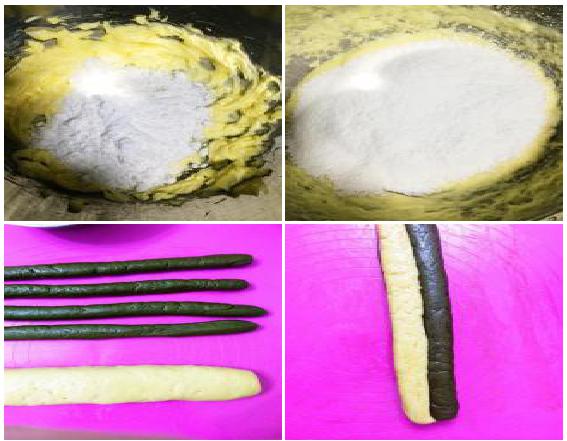
10. Add a little low-grade sugar powder and spread until slightly swollen to a pale yellow.
11. The flour in the sieve (containing starch), mixed evenly, rubbed into a dough by hand, but forgot to take a picture.
12. Green tea dough and beef oil dough are rubbed evenly into four small strips of dough, for a total of eight.
Steps 13 to 16
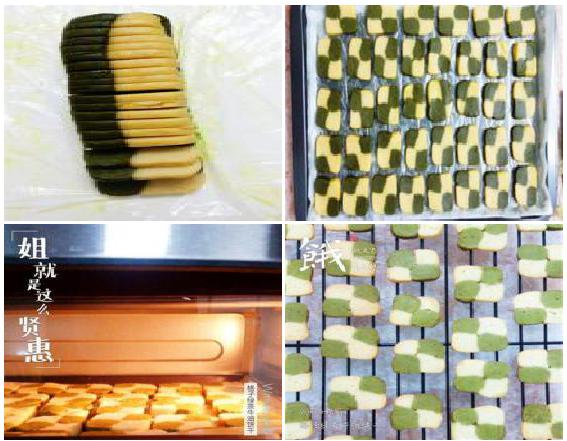
13. Then alternately stack 2 green teas with 2 beef butter dough, press into long rectangular strips, then wrap in preservative film, put in the refrigerator, freeze for 1.5-2 hours, remove the slices.
14. When the time comes, take it out of the refrigerator and cut it to a thickness of 0.5 cm.
15. Preheat the oven, put the sliced biscuits in the oven pan, arrange them neatly, not overlapping
16. Oven on low heat 170 degrees wind mode baking for 20 minutes is OK
Steps 17 to 20
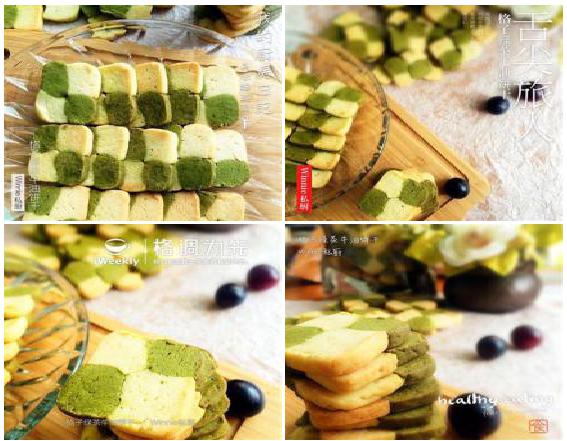
17. It's time to cool off.
18. The finished product is crispy, fragrant, less sugar, less oil.
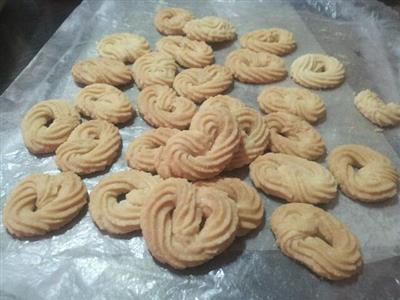
19. Map of the finished product
20. The finished drawing, no mold, not pressed beautifully enough, then improved!
Steps 21 to 24
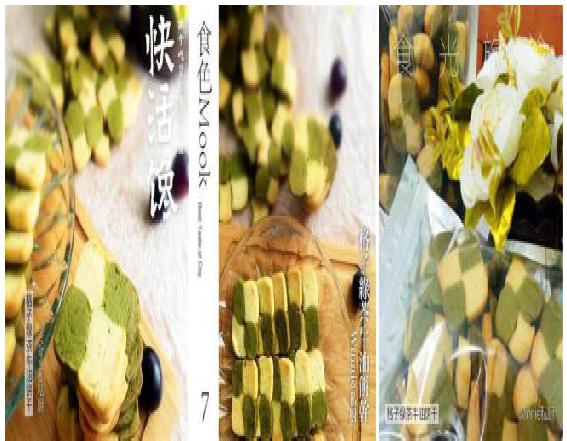
21. Map of the finished product
22. Map of the finished product
23. Map of the finished product
24. It's nice to have a picture of the finished product, put it in a honey bag, eat it slowly, or give it to friends and family!
Handy cooking tips
The dough should be slightly hard, easy to shape, and after shaping, put it in the refrigerator for 1.5-2 hours, not refrigerated.

REACTION RECIPES
- Red sugar red date toast
- Bread machine toast
- Bags of pineapple soup
- Honey-based crispy bread
- A small bread with almond cheese
- Black sesame seed bread
- Thousands of flowers
- Cabbage bread
- Cinnamon rolls
- Soup and bread
- Soup and bread
- A small meal pack of coconut milk
- Red rice bread
- 5 degrees of red bean sandwiches
- Tuna with onions
MOST POPULAR RECIPES
- Dried bread rolls of cinnamon blueberries
- A heart-shaped bag of milk and butter
- A small meal pack of coconut egg yolk
- Pumpkin bread
- Cabbage rolls
- Red sugar-filled smiley face bread
- Olive oil white toast
- Light cream bread
- Brewing tofu
- Danish cow horn bread
- Yogurt and jam packaging
- Black sesame bread
- It's a whole-wheat brown bread.
- The Pantheon
- Cream soft bread