Coconut and soda biscuits
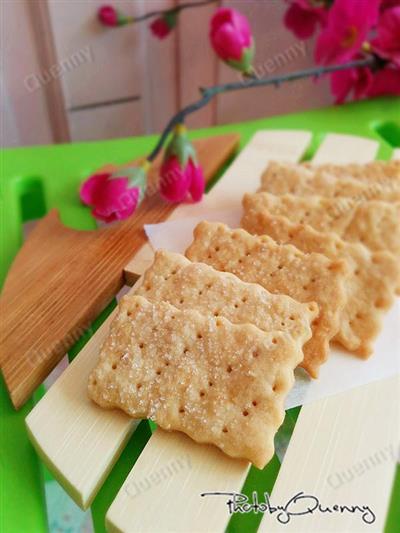
At the age of eleven, I went back to my parents' house, and I also invited them to stay for a few days, when I had the opportunity to take advantage of the holidays, I had the idea of how the church mother used the oven and the baking machine, my mother said it was too much trouble, how easy it was to buy when I wanted to eat?..In fact, my mother used to love to eat these little mouths, little biscuits, sugar cubes, whatever, there's always some in the pocket, it's all in the mouth when there's nothing to eat...This soda cookie was made for my mother at that time.It has a walnut flavor and a crispy taste, and the amount of oil and sugar is much lower than in a normal cookie, so even if you eat a little more, you don't have to worry about excessive calorie intake, it's very suitable for eating when you're wasting time.In fact, this cookie is also very simple to make, you don't need to know the state of the butter, you don't need to squeeze the flowers and other complex shapes, a simple mixture of materials, the slices can be shaped.So it's also very suitable for beginners to try, but if you want to make it crispy, there are still places to pay attention.The main thing is to make the slices thin enough, then slice them a little bit, and the final shape will be well preserved. Main ingredients: low-fat flour 150 g, 3 teaspoons of fine sugar, 1/4 teaspoon of salt, 1/4 teaspoon of baking soda, 60 g of warm walnut milk, 1 teaspoon of yeast flour, 30 g of butter.
WHAT YOU NEED
Ingredients
150 grams of low-fat flour3 teaspoons of fine sugar1/4 teaspoon of salt1/4 teaspoon of baking soda60 grams of warm walnut milk1 teaspoon of yeast flour30 grams of butterA moderate amount of edible oilModerate amount of flourWhite sugar in moderation
How TO MADE Coconut and soda biscuits
Steps 1 to 4
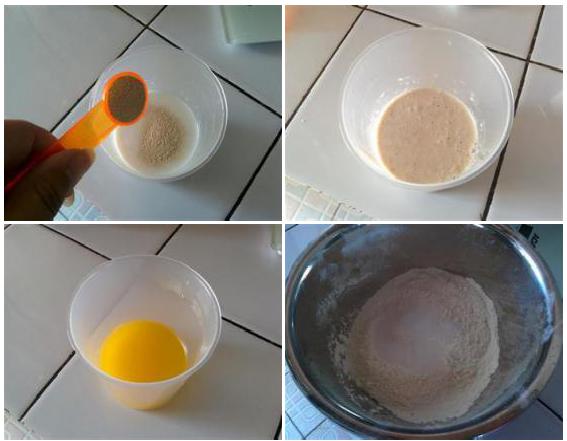
1. Yeast poured into warm milk
2. Standby for a while after stirring
3. Melting butter into liquid reserve
4. Add sugar, salt, and baking soda to the flour.
Steps 5 to 8
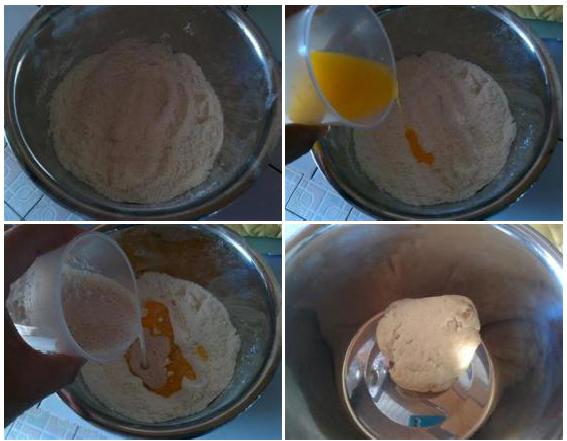
5. Holding it by hand
6. Pouring into butter
7. Pour into the yeast milk
8. Mix into a uniform dough, cover with a preservative film and let stand for 30 minutes.
Steps 9 to 12
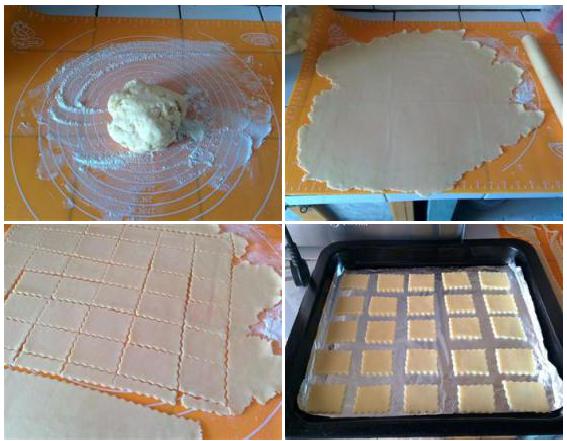
9. Sprinkle some flour on the wallpaper and put the dough on the wallpaper.
10. 1 to 2 mm thick slices
11. Draw a rectangle with a knife
12. Put the biscuits in the oven and set them up.
Steps 13 to 16
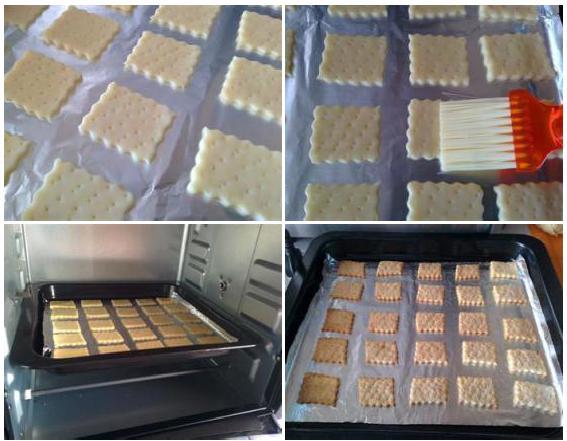
13. Forking small holes in the surface with a fork
14. Brush the surface with oil, then sprinkle some fine sugar as a decoration
15. Middle layer of preheated oven
16. 180 degrees, about 8 minutes, the stove is dried, sealed and stored
Steps 17 to 20
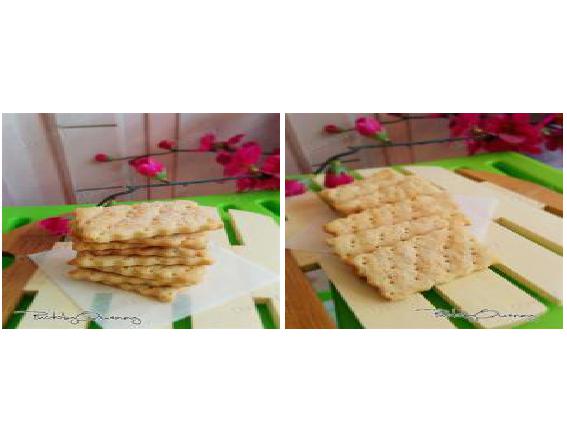
17. Map of the finished product
18. Map of the finished product
Handy cooking tips
1. be careful to make the dough thin enough so that it tastes crispy after roasting; 2. add sugar at the end for decorative purposes only, not adding sugar will not affect the finished product
REACTION RECIPES
- The two-color cookie
- Walnut and almond butter cookies
- Egg whites
- Cakes and pastries
- The cranberry cookie
- Cocoa and almond cake
- Cheese is crispy.
- Basic biscuits
- Oatmeal and black sesame cookies
- Italian finger cookies
- Baking My Life - The Wheel of Love
- Microwave cookies
- Handmade cranberry cookies
- The panda cookie
- The button cookie.
MOST POPULAR RECIPES
- Strawberry cake
- Red pomegranate cheese and velvet cake
- Grapefruit and almond cake
- Stuffed peaches
- Sweet walnut slices
- Walnut butter
- Stuffed walnuts
- Chestnut butter
- Homemade peaches
- It's like a vanilla cream puff.
- The cranberry cake
- A roll of cranberry cake
- The baking machine makes black sesame toast
- Thank you for the pumpkin pie.
- The apple pie.

 DESSERTS
  BAKING
  MAIN DISHES
  SNACKS
  CHINESE FOOD
  HOME
HOME
