The Vanilla Bubble
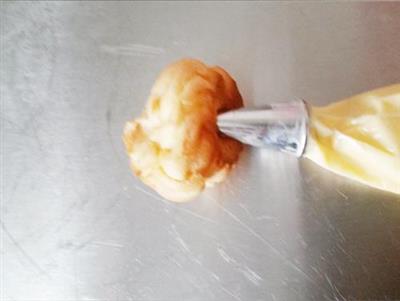
After a few exercises, I finally succeeded in making this little bubble, happy, happy! I found that it is not so difficult to make bubble as long as I mastered a few key points. Oh! First, the dough production, the production process must not be too dry and not too thin...I remember the first time I ate bubbles when I was in Shanghai, every day I would go to work and pass by the subway station and see that little bubble shop with a lot of people around the door, then I didn't know what bubbles were, I wasn't reassured, I used to go to work in a hurry and didn't buy them, on the day of someone's birthday I was thinking about buying him something that I hadn't eaten, I thought about that bubble shop, I bought a big one, the packaging looked good, the LOGO was like a cartoon old man with a beard like bubbles, the overall feeling was very high-end, I went home and found that the original empty shell tasted like cream.After coming to the place where I live now, I haven't seen a buffet, or maybe there's one in the city center that I don't go to very often, once I went to the restaurant and found that there was a cake shop in the restaurant, and I bought some, the shell was completely unfilled with cream, I guess I shouldn't have done it!It's delicious to make your own crispy herbs!
WHAT YOU NEED
Ingredients
100 grams of low-fat flour160 ml of water3 eggs (about 185 grams)80 grams of butter5 grams of white sugar2 grams of salt
How TO MADE The Vanilla Bubble
Steps 1 to 4
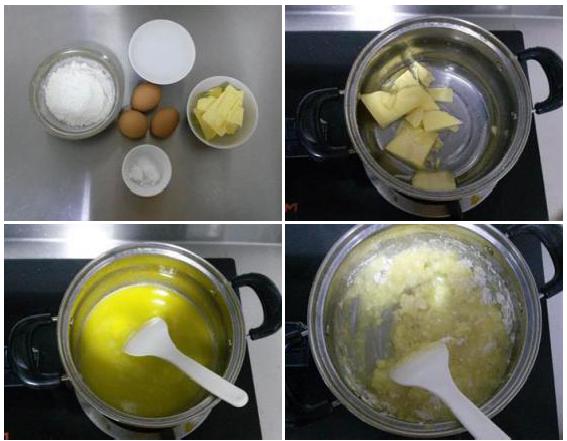
1. Prepare the necessary materials.
2. Pour the salt, sugar, and butter into the pan.
3. Heat until the butter is completely melted, stir evenly, boil until boiling, turn over low heat.
4. Pour all the flour at once, stirring rapidly and continuously.
Steps 5 to 8
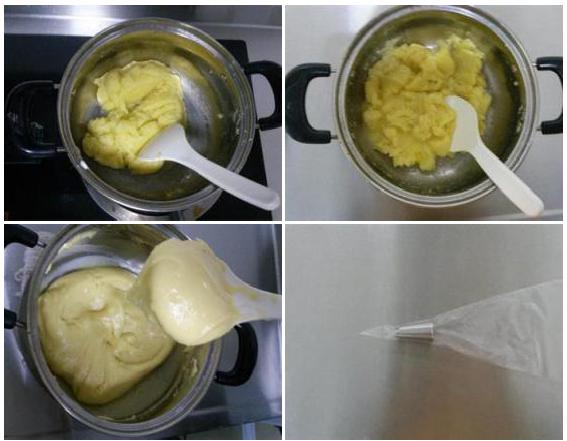
5. After stirring until the flour and the liquid are fully mixed and do not stick to the pan, turn off the fire, and this completes the cooking.
6. Mix the dough and let it cool down, and when it's not too hot, you can add the scattered eggs.
7. Note that the egg juice in the recipe does not have to be used up, I just finished it here, and I added the egg juice to the dough several times, and as the egg juice increased, the dough became more and more moist and thin, until the dough was in an inverted triangle state, and it did not slip, so I did not need to add the egg juice again.
8. Take a bag of flowers and put your mouth in it.
Steps 9 to 12
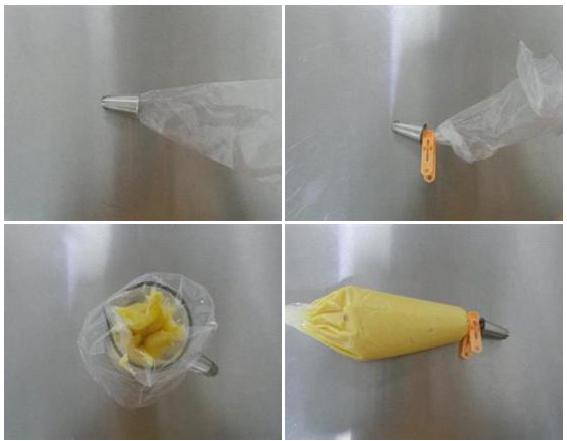
9. Cut off the front of the flower bag and push the flower mouth into the top.
10. Clamp the mouth with a clamp to prevent it from being left behind during loading.
11. Put the bag of flowers on a container so that it fits well.
12. After decorating, loosen the clasp and prepare to squeeze the foam.
Steps 13 to 16
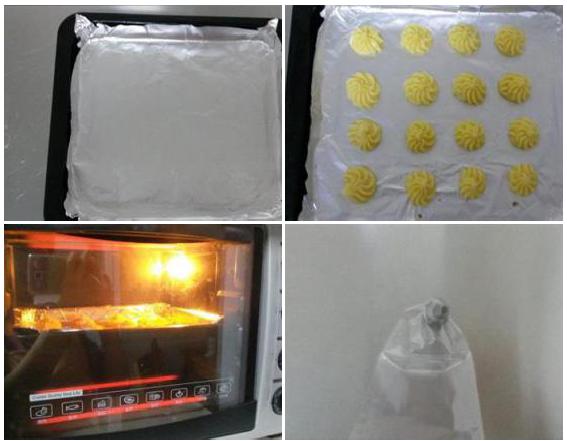
13. The pan is coated with a layer of tin paper and a thin layer of oil.
14. Squeeze into about 3-4 cm of foam dough, keeping a little distance in the middle.
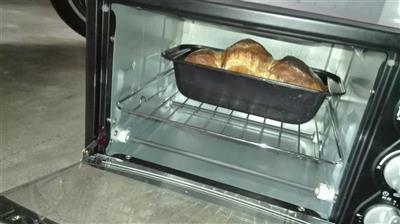
15. Put it in a preheated oven at 230 degrees, bake it for about 10 minutes, then turn to 200 degrees and bake it for about 15 minutes until the surface of the oven turns yellow-brown, be careful not to open the oven door in the middle.
16. Use a small table to put the filling in a bag of flowers.
Steps 17 to 20
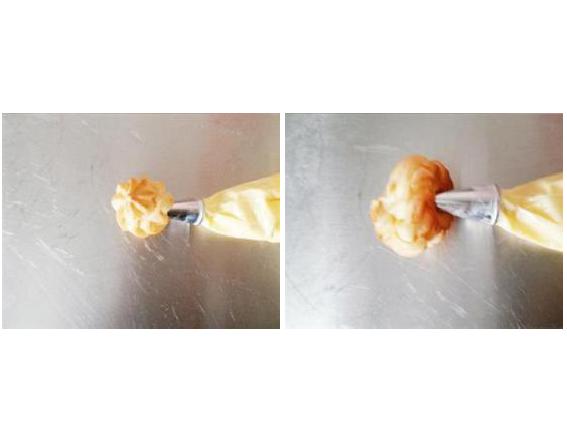
17. (See the filling method in the previous article)
18. The method is to cut the bouquet in two-thirds from the middle, do not cut it, squeeze the filling into the bouquet, if you do not have a small flower mouth, this method can also use a fresh bag to cut a small hole.
19. I prefer this method, because it's not easy for the filling to flow out, and it's not going to get everywhere.
20.
Handy cooking tips
The amount of egg yolk used will be slightly different, but as long as you remember that the egg yolk is picked up in an upside-down triangular state, and does not slide, you stop adding egg yolk, the egg yolk is too dry to be baked, it is easy to crack, too thin and will easily collapse, as long as the dough can be in an upside-down triangular state, and does not slide, the egg yolk is basically half successful.The second key, the cooking temperature, is to first use high heat to get him up quickly and then use low heat to dry him wet, so that the baked puff does not collapse, and the skin is crispy.Don't let the difference between high and low temperatures be too big, the difference is too big and it's easy to collapse, I used the oven's highest temperature of 230 degrees, the low temperature of 200 degrees, if it's still in the oven at 180 degrees it will collapse.
REACTION RECIPES
- Souped coconut bread
- Tofu bread
- Blueberry pudding packaged
- Big cat and little bread
- Yoghurt squeezed into bread
- Octopus ball bread that explodes with summer flavor
- Old-fashioned bread with olive oil
- Crowd selling bread
- Sandwiches and sandwiches
- Buttermilk bread
- Onion bread
- Red sugar walnut soft European bag
- Carrot cream wrapped
- Corn ham salad pack
- Onion bread
MOST POPULAR RECIPES
- The Swan Bubble
- Changing of the guard
- Yoghurt cakes
- Walnut butter paper cupcake
- Mango and jelly cheese cake
- Raw light cheese
- Chocolate paper cup cake
- Valentine's day cake
- The Black Forest cake
- Rainbow yogurt and mousse cake
- Yoghurt and fruit mousse
- Heart-shaped red velvet cream cake
- Pumpkin and rice pudding
- Light cheese cake
- Banana muffin cake

 DESSERTS
  BAKING
  MAIN DISHES
  SNACKS
  CHINESE FOOD
  HOME
HOME