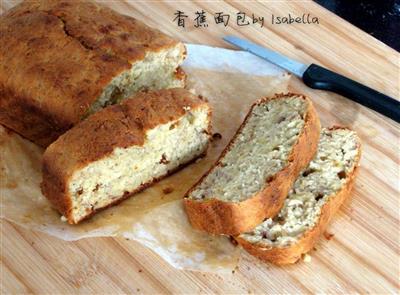
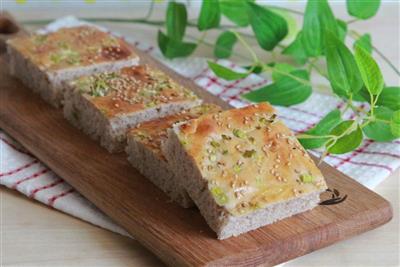
Bananas and walnuts
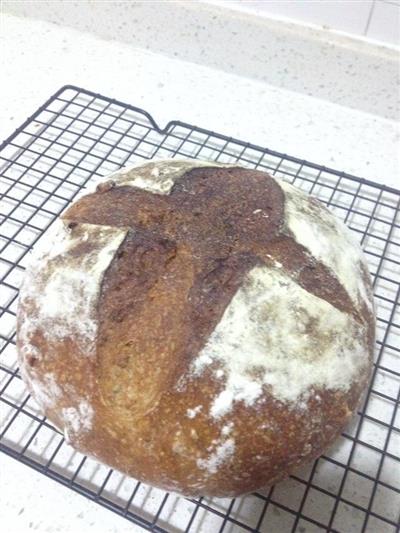
The original recipe was sweet potatoes, we didn't have any at home, we temporarily changed it to bananas, whole wheat flour wasn't enough, we changed it to black wheat flour, in fact, it's not necessary to make bread according to someone else's recipe, it's also very good to create it yourself, the first time you make a European cake, the result is more satisfied
WHAT YOU NEED
Ingredients
The amount of yeast60 grams of flour60 ml of water0.5 grams of yeastModeration of the main group200 grams of flour70 grams of whole wheat flour30 grams of rye flour120 grams of banana paste120 ml of whey (not necessarily all)5 grams of salt44 grams of shredded walnuts (this is all that's left in the house but you can add more)
How TO MADE Bananas and walnuts
Steps 1 to 4
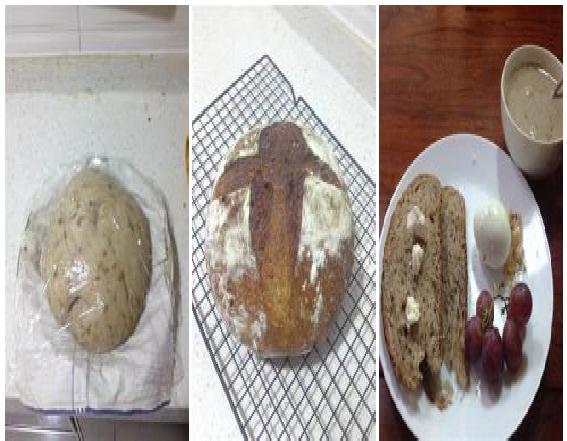
1. Mix the ingredients of the yeast head, cover the preservative film, ferment at room temperature until the dough is arched, put it in the refrigerator, here to say, the day of making it suddenly warmed up in the middle of the night, the result was especially high at night, can only be refrigerated, if the room temperature itself is relatively low, keep it at room temperature, the yeast head itself is refrigerated overnight and used relatively well
2. Mix in the main dough all the ingredients except the salt, the milk, the walnuts, then slowly add water, until the dough feels good, I added 100 ml, covered with a preservative film, and left for 20 to 60 minutes, this action is called soaking, that is, let the dough absorb enough water, while producing a certain firmness
3. Add salt, stir slowly until firmness begins to form, then add walnuts, stir slowly until even
4. Fermented at room temperature (25 degrees) 2.5 hours.
5. Folding once at 30, 60, 90, 120 and 150 minutes is to stretch the dough from side to side, then fold it back separately, then stretch the dough up and down, then fold it back separately.
6. When I did it, I couldn't do it, I folded it every 25 minutes, and I only folded it four times, and I was lazy, and I had to write a recipe, and I was drunk.
7. The fermented dough is rolled round and relaxed, formed into a round smooth face down, placed in a fermentation basket, covered with a preservative film, and refrigerated overnight.
8. There is no fermentation basket, but a cloth is placed in the fruit plate, the cloth is sprinkled with flour, and the fermentation is done.
9. And I had to go to work the next day, so I adjusted the fridge to three degrees, and in the end, my dough stayed in the fridge for 19 hours, and luckily it didn't ferment too much.
10. The next day, the dough is removed, the room temperature continues to ferment until the finger presses down slowly bounces back part of it, and finally the fermentation does not require fermentation until the finger presses down does not bounce back because the dough needs to be tall in the oven, support the opening, and if the fermentation does not bounce back, the dough will begin to shrink in the oven
11. The stones are placed in the top layer of the oven, preheated at 230 degrees, 30 minutes, the last ten minutes the grill is transferred to the bottom layer, the top layer is placed on the grill net, the grill is placed on the grill net, continue preheating for ten minutes
12. The dough is transferred to the baking paper, sprinkled, and packaged.
13. The first time I did it, I thought it was deep, but in the end I found that the cracks were good, that's how the dough retains its strength and continues to grow in the oven.
14. Pour water on the stones in the lower layer of the oven, close the door, take the dough, put it in the oven on the grill, then pour 200 ml of water on the stones, change the oven fire, bake for 10 minutes, then remove the grill with the stones in the lower layer, change the fire, continue to bake for 25 minutes, start with 10 minutes only use the fire to prevent the surface to peel too fast, affecting the dough to continue to grow high
15. After baking, remove and dry in the baking net.
16. The breakfast.
Handy cooking tips
It's good to store the tips, how much to eat, how much to cut, and then wrap the slices in a preservative film and put them in a dry room temperature, so that the skin stays crisp and the inside stays soft, without freezing the slices at all.
REACTION RECIPES
- Blueberry mousse cake
- A quick banana and rice cake
- Strawberry mousse cake
- Chiang Kai-shek cake with leaves
- Cocoa and honey cake
- Castor nut cake
- Mango mousse cake
- Whole egg sponge cake
- Cake with meatballs
- Fennel Snow
- A small blueberry sponge cake
- White chocolate and banana cocoa
- What is the name of the city?
- Original flavored cake
- Cranberry cake rolls
MOST POPULAR RECIPES
- The BMW biscuit
- Clouds swallowing fruit
- Cocoa and almond cookies
- The cranberry cookie
- Cabbage pie
- Shaped cookies
- Salted onions
- Sesame seeds
- I like biscuits.
- Kitty cat and chocolate chip cookies
- Red sugar oatmeal cookies
- The bird's-eye view of the flower
- Sesame and crispy cookies
- Margaret's cookies
- Lemon cookies
RECIPE TAGS:
-
The amount of yeast60 grams of flour60 ml of water0.5 grams of yeastModeration of the main group200 grams of flour70 grams of whole wheat flour30 grams of rye flour120 grams of banana paste120 ml of whey (not necessarily all)5 grams of salt44 grams of shredded walnuts (this is all that's left in the house but you can add more)

 DESSERTS
  BAKING
  MAIN DISHES
  SNACKS
  CHINESE FOOD
  HOME
HOME
