 DESSERTS
  BAKING
  MAIN DISHES
  SNACKS
  CHINESE FOOD
  HOME
HOMETea cake rolls
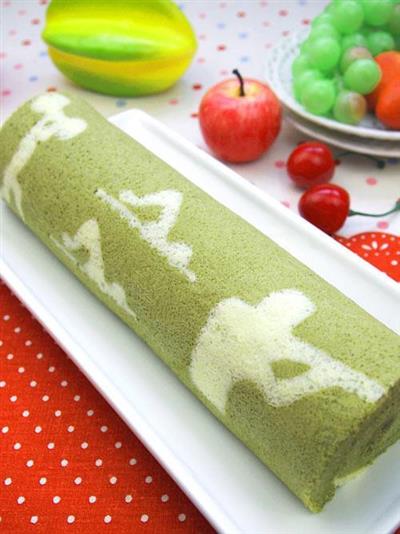
In the summer of 2012, it was unusually hot, and even in the most human-friendly coastal city in the world, it was sweaty.It's one of the coolest cities in China in the summer.I haven't done anything for six months since the last red flower cake roll, and I always want to wait for the weather to cool down and start again.After the opening of the Olympics, watching the athletes sweat like rain on the field, fighting for gold and silver, I couldn't help but make a cake roll with the pattern of this sports project.I painted it with matcha powder, made it into a green field, and painted it with the pattern of China's gold-mining project, in order to congratulate the Chinese delegation on the opening of the door!
WHAT YOU NEED
Ingredients
Four eggs.80 grams of low-fat flour10 grams of fine sugar50 grams of sesame oil65 grams of milk1 gram of salt5 drops of lemon juice1 tablespoon of tea powder
How TO MADE Tea cake rolls
Steps 1 to 4
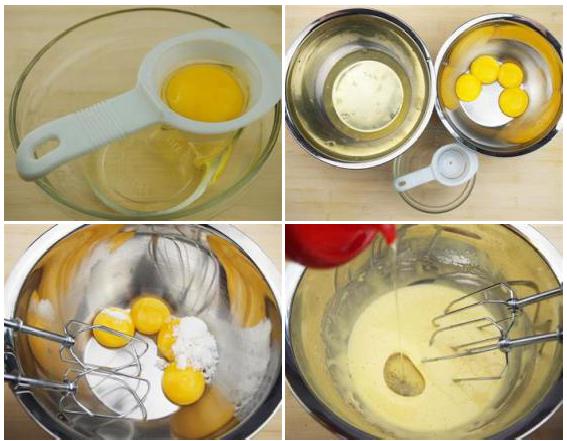
1. Use an egg separator to separate the protein from the egg yolk (Figure 1), taking care not to let the protein touch the egg yolk when separating the egg.
2. Protein and egg yolk are poured into the egg-making bowl (Figure 2) and the egg-making bowl must be water-free and oil-free.
3. The pot with the protein is a little bigger.
4. This protein bowl is a 20cm stainless steel deepening bowl, an 18cm egg yolk bowl.
Steps 5 to 8
5. Put 1 gram of salt in the egg yolk bowl (Figure 3).
6. Salt can make sugar taste less sweet.
7. Add 10 grams of refined sugar.
8. Stir evenly with an electric egg beater.
Steps 9 to 12
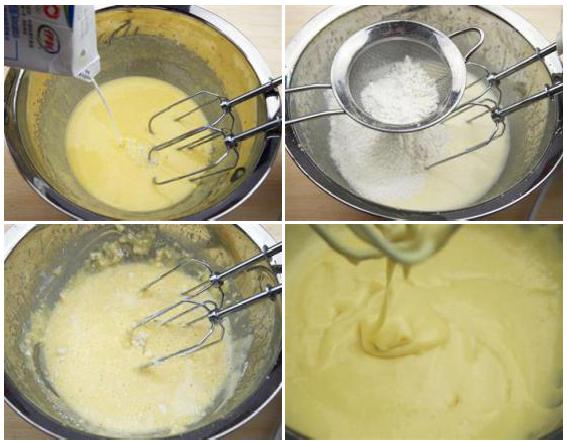
9. Add 50 grams of olive oil three times, stirring evenly with an electric egg beater each time (Figure 4).
10. Pour 65 grams of pure milk into the egg yolk bowl (Figure 5) and stir evenly until the oil and water are mixed.
11. Sieve 80 grams of low powder into the egg yolk bowl (Figure 6).
12. The electric egg breaker is not electrified, and is stirred to a basically dry flour-free state (Figure 7).
Steps 13 to 16

13. The electric egg breaker is charged and stirred evenly to a particle-free paste (Figure 8).
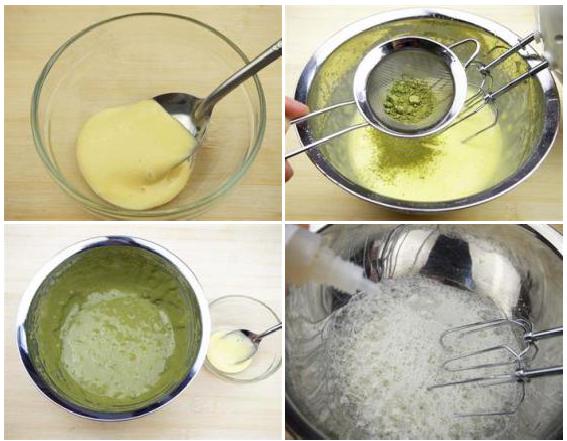
14. Take 16 grams of egg yolk in a small bowl (figure 9) with a spoon.
15. Sieve 1 tablespoon of matcha powder into the egg yolk bowl (Figure 10).
16. The electric egg batter is not electrically stirred to a basically dry powder-free state, and the electrically stirred is uniform to a particle-free paste (Figure 11) ⁇
Steps 17 to 20
17. So we have two different colored egg yolks, and we put two egg yolks on the side as a backup.
18. Use an electric egg beater to disperse the protein and add 5 drops of lemon juice (Figure 12).
19. Add one-third (17 grams) of 50 grams of fine sugar when stirred to the shape of a fish eye (Figure 13).
20. Add one-third of the fine sugar (17 grams) until the protein begins to thicken and double in volume to form the fine foam shown in Figure 14.
Steps 21 to 24
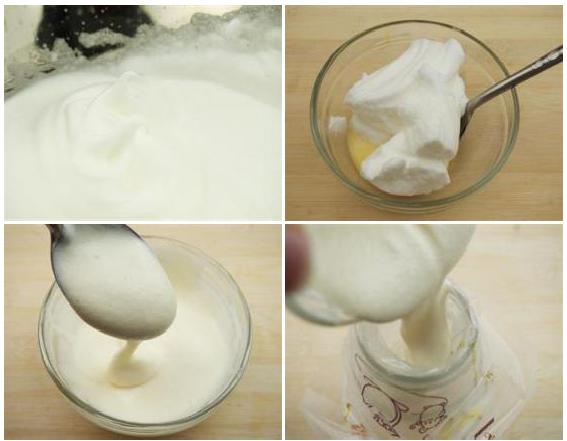
21. Continue stirring until the protein is thicker, the surface is striped, and the protein peak on the egg beater drops (Figure 15), adding the remaining fine sugar (16 g)
22. Continuing to stir, the protein spike on the egg-breaker grows and does not stand upright (Figure 16), indicating that it has reached the level of moist foaming, i.e. the level of nine distribution.
23. It's enough to make a cake roll, and the protein reaches this level.
24. At this time, the protein has a pattern, but the touch is lighter and softer.
Steps 25 to 28
25. The proteins in the basin are curved and pointed (Figure 17).
26. Take about twice as much protein as the original egg yolk in a small bowl (Figure 18).
27. Stir with a spoon and slice until the protein is completely mixed with the original egg yolk (Figure 19).
28. The mixed dough is thick and uniformly moon-white.
Steps 29 to 32

29. Take a small bag of flowers, put it in a wide-mouthed glass bottle, and turn the part of the bottle that rises above the mouth out of the bottle.
30. Pour the raw cake paste into the flower bag (Figure 20)
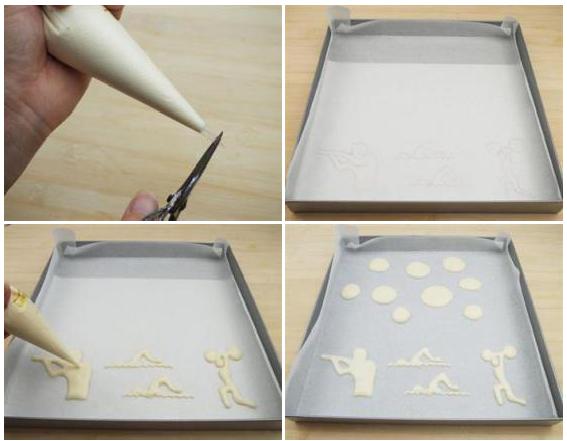
31. Tie a knot at the open end of the bag and cut a small hole in the thin end of the bag with scissors (Figure 21).
32. The pan is covered with pre-painted paper (printed or hand-drawn, obviously) and then oil paper (Figure 22).
33. Holding a bag of flowers (figure 23), drawing patterns on oil paper.
34. After drawing the pattern, draw out the white paper with the movement project pattern underneath the oil paper.
35. The remaining paste can be drawn in any number of circles in the area without a pattern, so that there is no waste.
36. Place the pan in a preheated oven at 180°C and bake for one minute.
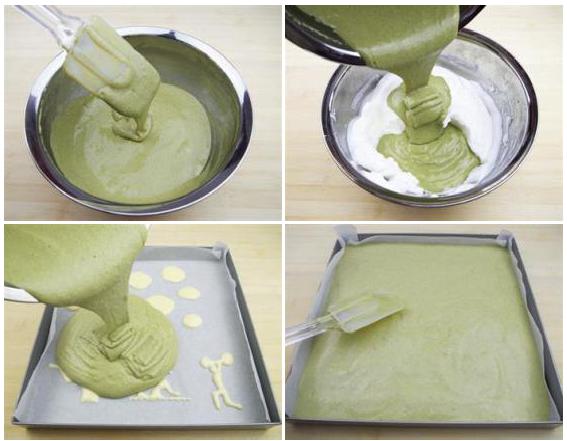
37. At the same time as baking the designs of the sports project, take the time to make the matcha cake paste.
38. Take one-third of the protein and put it in a saucepan.
39. Stir evenly with a rubber scraper (Figure 25).
40. Be careful to stir from the bottom up, as in stir-frying, do not stir in circles, so that the protein does not dissolve.
41. It can also be used by chopping.
42. After stirring evenly, the dough is poured into the protein bowl (Figure 26) and stirred and stirred in the same way until the protein and egg yolk are completely mixed and the dough is a thick, uniform green.
43. Cut and mixed matcha cake paste is poured onto a well-baked stereotypical sports project pattern (Figure 27).
44. Use a rubber scraper to smooth the cake (Figure 28).
45. Hold the grill in both hands, lightly knock a few times, shake the air bubble.
46. Put the lower layer in the preheated oven (Figure 29) and bake at 180 degrees for 21 minutes.
47. It's elastic and doesn't stick to your hands.
48. Remove the pan from the oven.
49. Holding the oil paper on both sides with both hands, remove the cake from the baking tray, place it in the cold net, and carefully peel off the oil paper around it (figure 30).
50. Lay a sheet of oil paper on another cold net, fasten the cake upside down on the new oil paper, and uncover the original oil paper (figure 31).
51. In the first cool net, a new sheet of oil paper will be laid, and the cake that was removed from the oil paper will be placed upside down on the new oil paper again.
52. Use a doughnut stick to roll the oil paper and roll the cake.
53. The chopsticks are rolled back, the cake is naturally rolled forward.
54. 10 minutes after rolling (Figure 32)
55. Open the oil paper, cut out the two irregular parts and it's OK.
56.
Handy cooking tips
1
REACTION RECIPES
- Chocolate peanuts and biscuits
- Orange roasted cookies
- Low-fat cranberry cookies
- Rosemary dishes
- Peanut and walnut cakes
- Fingers crossed
- Coke and cookies
- Sesame protein cookies
- Margaret's little cake
- The panda cookie
- Chocolate soft-hearted cookie
- The original cookie
- The button cookie.
- Cranberry cookies
- It's a lot of fun.
MOST POPULAR RECIPES
- Chocolate berries
- Sweet potato pie
- Margaret's little cake
- The peanut butter cookie
- The giraffe biscuit
- The cranberry biscuit
- Whole-wheat cakes - for one person
- Wheat flour and barley
- Cranberry cookies
- Cereal and nut energy bars - a delicious way to fight hunger
- Fruit and beans
- The baby's favorite, the mother's handmade egg yolk cookie
- Sunflower biscuits
- Egg yolk cake with baby's mouth
- Margaret's biscuits, ready to eat