 DESSERTS
  BAKING
  MAIN DISHES
  SNACKS
  CHINESE FOOD
  HOME
HOMELittle Bear paints a cake roll
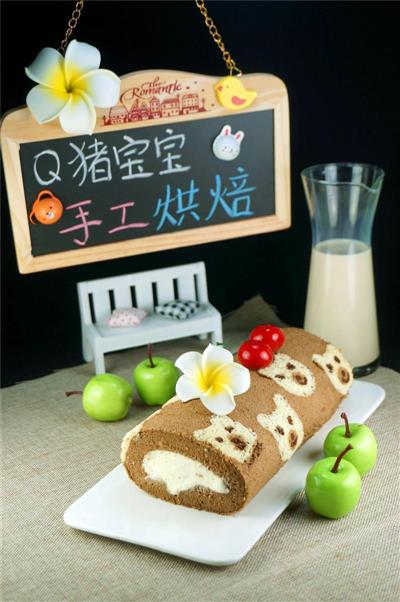
Continue the journey of experiencing the once-flying high-end electronic oven, this time trying to make a cake.Thinking that my baby's wish was to eat my mom's cute birthday cake, I chose to make this cute little bear colored cake roll.This time the drawing is a bit wrong, the baby bear turned into the ugly bear daddy, but it still tastes good.The M-type heat-generating color is uniform, the control knob can display the temperature and time, the setting is the result, it can also be reserved, DIY custom baking mode: up to 12 hours reservation, automatic record keeping It's made me love baking more, it's made me love digging in the kitchen more -- I heard it's coming out on June 10th, so look forward to it!
WHAT YOU NEED
Ingredients
10 grams of cocoa powderThree whole eggs.Protein one65 grams of refined sugar60 grams of water40 ml of olive oilA70 grams of low-fat powderLow starch powder B3/4 teaspoon1 teaspoon of cornstarchA little chocolate.150 grams of creamFine sugar B 15 g
How TO MADE Little Bear paints a cake roll
Steps 1 to 4
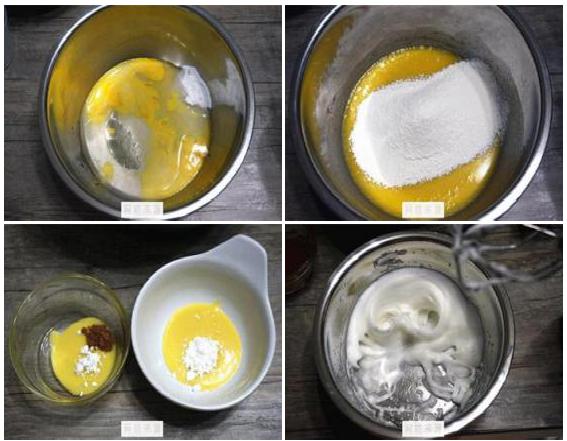
1. First, mix three egg yolks, 60 grams of water, 40 ml of olive oil, and 35 grams of fine sugar evenly.
2. Then sift into 70 grams of low-strength powder and stir until smooth.
3. Take two tablespoons of egg yolk into a small bowl and mix evenly with 1/2 tablespoon of low starch powder.
4. Take another teaspoon of egg yolk, add 1/8 teaspoon of low starch flour and 1/8 teaspoon of cocoa powder, and mix into a light-colored cocoa paste.
Steps 5 to 8

5. A protein is blown into a bubble, and then a little cornstarch is added, and it continues to blow into a wet, semi-dry bubble.
6. Preheat the oven at 170 degrees at the same time.
7. Add one-third of the protein cream to the small yellow dough and mix, and take another 3 tablespoons of the protein cream to the cocoa dough and mix.
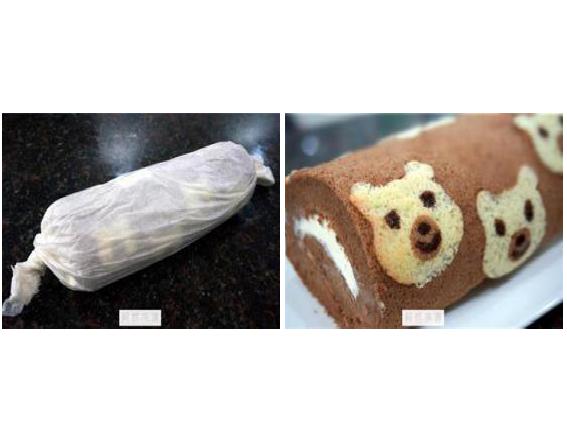
8. Separately packed in bags.
Steps 9 to 12
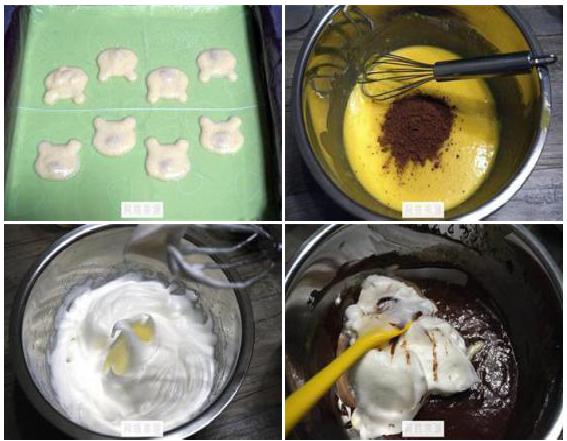
9. A layer of oil is then brushed over the grill pad and the bear's nose is drawn with cocoa paste, as shown in the picture.
10. Put it in the oven and bake it for one minute.
11. Then draw the shape of the bear's head, put it in the oven, bake it for a minute, take it out.
12. Add the remaining cocoa powder to the egg yolk in a large bowl and stir evenly.
Steps 13 to 16
13. Add 30 grams of refined sugar three times, send the remaining 3 proteins to the large curved state, add the remaining cornstarch, and stir for a few seconds.
14. Mix all the protein cream evenly with the cocoa cake paste.
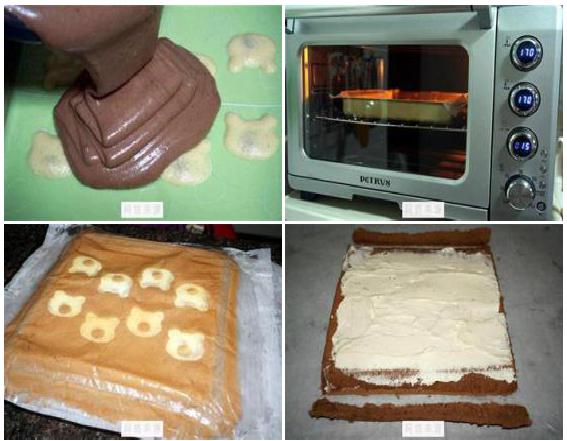
15. Pour cocoa cake paste onto the pattern, shake out the bubbles, and flatten the surface.
16. Put in the middle layer of the oven and bake for 15 minutes.
Steps 17 to 20
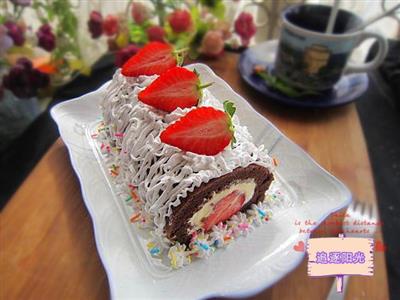
17. After baking, cover the surface with a new sheet of grease-absorbing paper, then turn the cake upside down on the cooling rack, tear off the baking paper, cover it back on the cake body, and cool it.
18. The cooling process involves adding 150 grams of light cream to 15 grams of fine sugar to create a hard foam and applying it to the body of the cake.
19. Cut the top of the cake slightly to the side.
20. Roll up, put in the refrigerator and refrigerate for half an hour.
21. After shaping, you can use chocolate sauce to point your eyes, nose, and mouth.
22.
Handy cooking tips
It is not advisable to cook the pattern for too long, from one minute to one and a half minutes.2 When the cake is out of the oven, immediately turn it upside down and tear the baking sheet, so that the water does not disperse when the cake is heated, and the pattern does not tear.


REACTION RECIPES
- Whole wheat bread
- Onion and cheese bread
- Soup and four-leaf clover bread
- Bread maker ultra-simple European cheese and large bread
- Peanut oil and rose bread
- Meat loaf rolls
- Whole wheat onion hot dog rolls
- Apple and cinnamon bread
- Swedish cinnamon rolls
- Red bean cups and bread
- The love of the flesh-eating tribe - bacon bread
- Heide cheese bread
- German meal packages
- Egg toast
- Milk and cream